 listicle
5 Best Temporary Roof Patch Materials
Table of Contents
- Why Temporary Roof Patches Matter in an Emergency
- Quick Comparison of Top Temporary Roof Patch Materials
- 1. Roofing Tape for Leaks: Fast Adhesive Sealing
- 2. Roofing Cement and Mastic: Flexible Waterproof Coating
- 3. Roof Tarp for Leak Coverage: Heavy-Duty Protection
- 4. Rubber Patches and Liquid Sealants: Durable Waterproofing
- 5. Tar Paper and Sheet Metal: Budget-Friendly Covers
- How Long Does a Temporary Roof Patch Last
- Frequently Asked Questions
Last Updated: October 5, 2026
Why Temporary Roof Patches Matter in an Emergency
A roof leak during heavy rain can cause serious interior damage within hours: ceiling stains, mold, structural deterioration, and costly repairs. This guide from Sound Roof Care covers the five best temporary roof patch materials to stop active leaks until professional repairs are possible, with application steps and guidance on which works best for your situation.
Quick Comparison of Top Temporary Roof Patch Materials
Not every patch material belongs on every roof. Asphalt shingles, metal, tile, flat membranes, and RV roofs each react differently to adhesives, fasteners, and sealants, and the wrong pairing can fail fast or damage the roof.
| Material | Best For | Application | Durability | Works Best On | Avoid On |
|---|---|---|---|---|---|
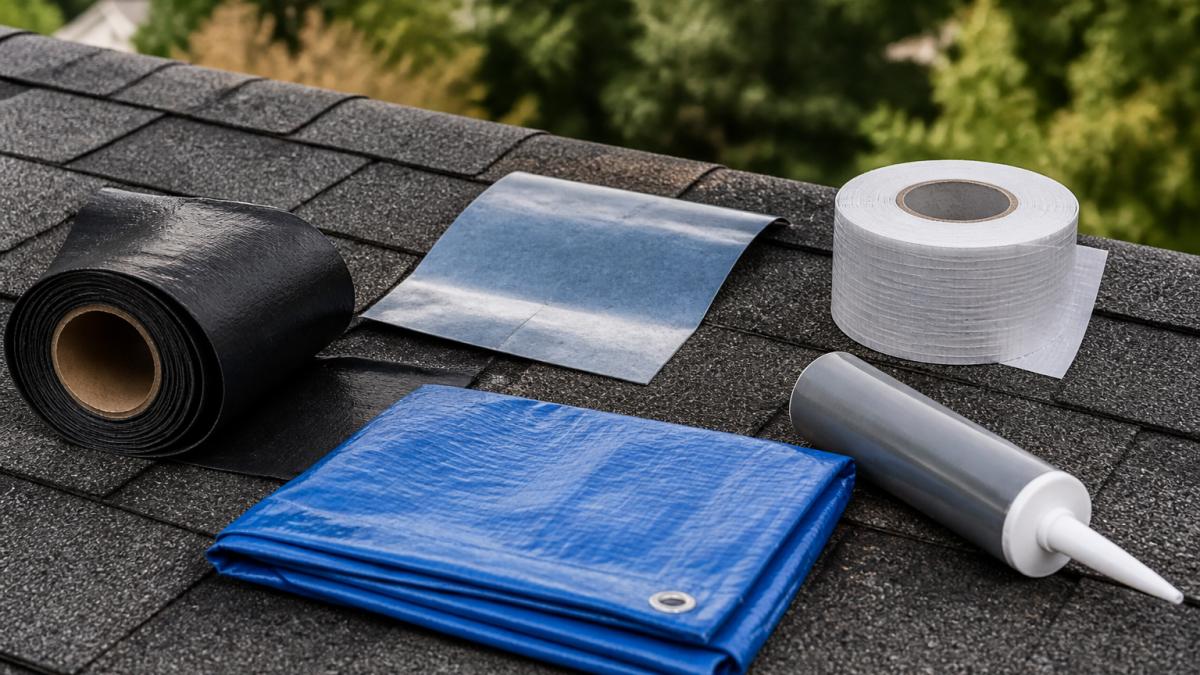
| Roofing tape | Small punctures, quick fixes | Peel and stick | 3-6 months | Asphalt shingles, metal, RV roofs | Heavily granulated or wet tile |
| Roofing cement | Active leaks, wet conditions | Brush or trowel | 6-12 months | Asphalt shingles, flat roofs, metal seams | Some single-ply membranes that solvent-based cement can degrade |
| Roof tarp | Large damaged areas | Secure with battens | 3-6 months | Any roof type as a cover | Not a substitute for membrane repair on flat roofs |
| Rubber patches | Flexible surfaces, movement | Peel and stick or liquid | 6-12 months | Metal, RV roofs, curved surfaces | Loose or gravel-surfaced flat roofs |
| Tar paper | Budget repairs, temporary cover | Nail or secure | 3-6 months | Asphalt shingles, under cement | Tile and metal where nails cause damage |
Compatibility notes by roof type
Asphalt shingles. Tape, cement, rubber patches, and tar paper all work here.
Metal roofs. Adhesive tape and rubber patches bond well to clean metal and avoid the fastener holes nails would create.
Tile roofs. Walking on tiles causes more damage.
Flat and low-slope roofs. Cement and liquid rubber flow into seams and ponding areas.
RV roofs. Rubber patches and liquid rubber are the common pick because RV roofs flex.
How to read this table
Start with the "Works Best On" column to eliminate materials that do not belong on your roof, then use damage size and conditions to pick between the rest. A tarp covers the most area but is hardest to install; tape is fastest but least durable; cement and rubber handle the widest range of conditions.
1. Roofing Tape for Leaks: Fast Adhesive Sealing
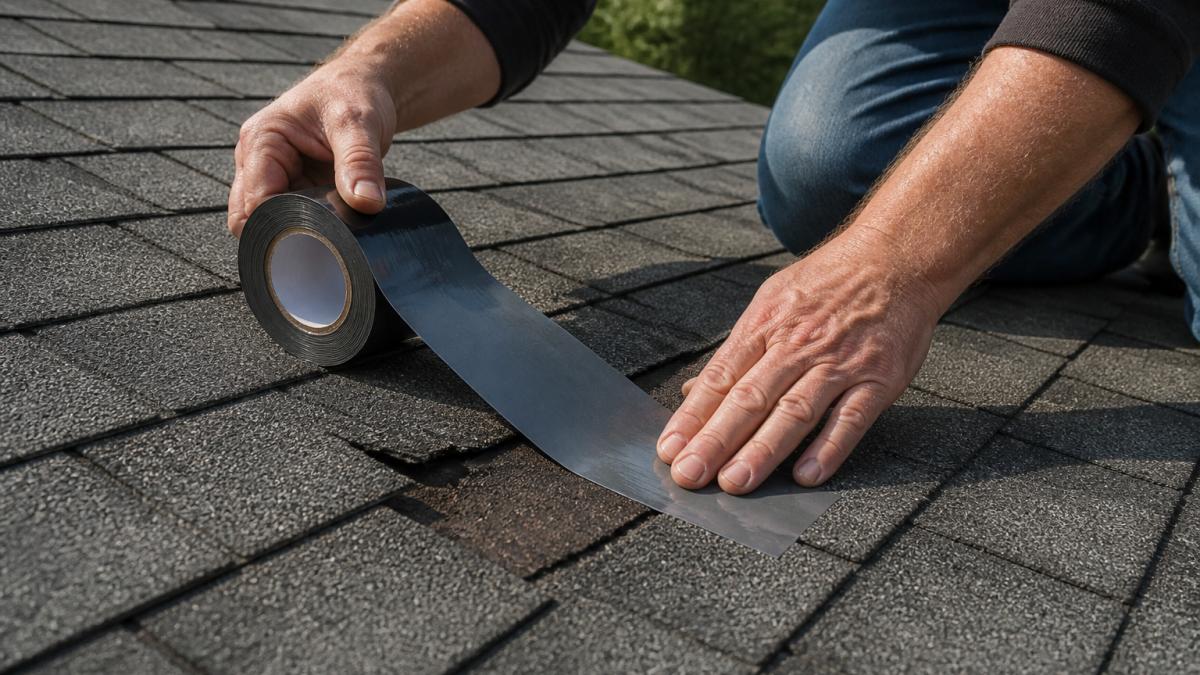
Roofing tape offers the quickest temporary roof patch for small leaks and punctures. It bonds directly to the roof without tools and works on wet surfaces, ideal when rain is actively falling.
How to apply roofing tape
Clear debris and wipe away loose dirt and moss; if water is actively dripping, dry the patch area with a towel. Cut the tape to extend at least 3 inches beyond the damage in all directions, peel back the backing, and press firmly from the center outward for 30 seconds to eliminate air bubbles.
Pros and cons
Roofing tape applies in under 10 minutes, needs no special tools, dries immediately, and sticks to wet surfaces. The main limitation is longevity: most tapes last 3-6 months before UV exposure and temperature cycling degrade the adhesive, and they struggle on textured surfaces or heavily granulated asphalt shingles where contact is incomplete.
2. Roofing Cement and Mastic: Flexible Waterproof Coating
Roofing cement creates a flexible waterproof barrier that fills gaps and seals cracks. Unlike tape, it bonds chemically to the roof and accommodates movement from temperature changes, suiting active leaks and wet-weather repairs.
Application steps
Clean the damaged area thoroughly, removing moss, loose shingles, and debris; if water is actively leaking, dry the surface with towels or let it air-dry 15-30 minutes. Apply cement with a putty knife or caulking gun, spreading it at least 3 inches beyond the visible damage and pressing it firmly into cracks and gaps.
When to use roofing cement
Roofing cement works best for cracks, seams, and areas where water is actively entering, especially on asphalt shingles and flat roofs, and bonds to wet surfaces better than tape. Use it when your temporary roof patch needs to last several months; the flexible coating maintains its seal through temperature swings, though direct sunlight degrades it faster than tape, so plan for replacement within 6-12 months.
3. Roof Tarp for Leak Coverage: Heavy-Duty Protection
A heavy-duty tarp provides the most comprehensive temporary roof patch for large damaged areas, protecting an entire roof section from water intrusion from storm damage, missing shingles, or structural damage.
Installation and securing the tarp
Select a tarp extending at least 6 feet beyond the damage in all directions. Position it with the high side facing uphill toward the ridge, then secure it with wooden battens (2x4 lumber) nailed along the edges, spacing nails every 2 feet so they penetrate the tarp, batten, and roof deck. For extra security, tie the corners to sturdy roof attachments or ground anchors.
Best practices for tarp placement
Cover the entire water intrusion path, not just visible damage: water flows uphill from the damage point, so extend coverage well above the highest point of visible water entry. Use polyethylene sheeting rated for outdoor use, typically 6-mil or heavier, since standard plastic tears easily. Check the tarp regularly, especially after heavy wind or rain, retightening battens and inspecting for tears or punctures.
4. Rubber Patches and Liquid Sealants: Durable Waterproofing
Rubber patches and liquid rubber sealants create a flexible, durable waterproof barrier that accommodates roof movement better than rigid patches and resists UV degradation longer than tape or cement.
Peel-and-stick rubber options
Peel-and-stick rubber patches work like roofing tape but last longer. Clean the area, remove the backing, and press firmly, extending coverage 3 inches beyond the damage; they bond chemically rather than relying on adhesive alone. The flexible material conforms to curved surfaces and textured shingles where tape struggles, maintaining its seal through temperature changes.
Liquid rubber application
Liquid rubber sealants are brushed or sprayed on and cure into a continuous waterproof membrane, ideal for irregular shapes and multiple cracks across a larger area. Apply according to product instructions, typically in two coats with drying time between applications; once cured, liquid rubber resists UV damage and accommodates roof movement.
5. Tar Paper and Sheet Metal: Budget-Friendly Covers
Tar paper and sheet metal provide economical temporary roof patch solutions when other materials aren't available.
Sheet metal patches work for punctures and small tears. Cut a patch at least 6 inches larger than the damage in all directions, secure it with roofing nails, and seal the edges with roofing cement. Metal reflects heat and resists UV damage, but it's less flexible than rubber and can create condensation issues in certain climates.
How Long Does a Temporary Roof Patch Last
Most temporary roof patches hold for 3 to 6 months, but that number hides the real variables: what the patch is bonded to, what weather it faces, and how well the surface was prepped.
Expected service life by material
| Material | Realistic service life | Best damage size | Wind resistance | Ease of install |
|---|---|---|---|---|
| Roofing tape | 3-6 months | Punctures and cracks under 2 in. | Low to moderate | Easiest, no tools |
| Roofing cement or mastic | 6-12 months | Cracks, seams, holes up to a few inches | Moderate | Easy, needs a trowel or caulk gun |
| Roof tarp | 3-6 months | Large areas, several square feet and up | High when battened | Hardest, needs lumber and fasteners |
| Rubber patch or liquid rubber | 6-12 months | Punctures up to a few inches; liquid covers irregular areas | Moderate to high | Easy to moderate |
| Tar paper or sheet metal | 3-6 months | Small to moderate, best under cement | Moderate | Moderate, needs nails |
These ranges assume a clean, reasonably dry surface and a patch that extends well past the damage. Skip surface prep and every one of these numbers drops.
The four factors that shorten or extend a patch
Damage size. Tape and rubber patches are economical for punctures and short cracks, but once damage spans several square feet, only a tarp covers enough area to redirect water.
Weather exposure. UV light breaks down adhesives first, so south- and west-facing patches fail sooner than shaded ones.
Installation quality. A patch that overlaps the damage by only an inch will lift at the edges.
When to stop patching and call a professional
A temporary patch is a bridge, not a fix. Get professional help if you see any of the following:
- Sagging or soft decking under the patch, which points to structural water damage rather than a surface leak.
- A patch that keeps failing in the same spot, which usually means water is entering somewhere other than where you are patching.
- Worsening interior leaks despite a patch that looks intact, which suggests trapped moisture or a second entry point.
- Any contact between water and electrical wiring, fixtures, or a ceiling with a light fixture nearby. Do not go on the roof or into the attic near wet electrical components; shut off power and call a licensed electrician and roofer.
A quick selection shortcut
- Small puncture, dry day, need it done in minutes: roofing tape.
- Active leak, wet surface, want it to last through the season: roofing cement or mastic.
- Large storm damage across several square feet: battened tarp.
- Curved, textured, or moving surface: rubber patch or liquid rubber.
- Tight budget and a small area: tar paper or sheet metal sealed with cement.
Match the material to the damage and conditions, not to whichever box is closest on the shelf, and your patch will buy you the time you need.
Frequently Asked Questions
What is the best temporary roof patch material for an active leak?
Roofing tape and roofing cement work fastest for active leaks because they create a waterproof seal immediately. Roofing tape adheres in seconds; cement provides flexibility as it dries. For larger damaged areas, a roof tarp offers the most reliable temporary coverage. Choose based on damage size: tape for small punctures, cement for cracks, tarps for major sections.
How long does a temporary roof patch last?
Most temporary patches last 3 to 6 months, depending on weather and material. Roofing tape and cement degrade faster in extreme sun and freeze-thaw cycles. Tarps may last 2 to 4 months before UV damage and wind stress weaken them. Rubber patches last longer, up to 12 months. None are permanent; plan a full repair or replacement within this window.
Can I use roofing tape for leaks during heavy rain?
Roofing tape works best on dry or damp surfaces; heavy rain reduces adhesion. If rain is falling, use roofing cement or a tarp instead. Cement can be applied to wet surfaces and hardens as it dries. If you must use tape, dry the area with a cloth first, work quickly, and press firmly for 30 seconds to ensure adhesion.
How do I secure a roof tarp for leak protection without damaging the roof?
Lay the tarp over the damaged area, extending at least 3 feet beyond the leak in all directions. Secure it with wooden battens (1x4 lumber) along the edges, fastening them with nails or screws through the tarp into the roof decking. Avoid fastening directly through the undamaged shingles. Ensure the tarp slopes toward the gutters to shed water away from the leak.
Should I use roofing cement or a rubber patch for a small hole?
For holes under 2 inches, roofing tape is fastest and cleanest. For holes 2 to 6 inches, a rubber patch or roofing cement works well; cement is cheaper but less durable, while rubber patches last longer and resist weather better. For holes over 6 inches, layer a rubber patch with cement underneath for maximum adhesion, or use a tarp to cover the entire damaged section.