 how-to
How to Find Roof Leak Source in Attic
Table of Contents
- What to Look for When Finding a Roof Leak in the Attic
- How to Find a Roof Leak Without Going on the Roof
- Step-by-Step Attic Inspection Procedure
- Roof Leak Detection Tools That Work
- Attic Condensation vs Roof Leak: How to Tell the Difference
- Document Your Findings and Know When to Call a Professional
- Frequently Asked Questions
Last Updated: October 8, 2026
What to Look for When Finding a Roof Leak in the Attic
Learning how to find roof leak source in attic is the first step toward stopping water damage before it spreads.
The key is knowing which visual clues matter most. Roof leaks don't always appear directly above ceiling water damage, water travels along rafters, roof decking, and structural beams before dripping into your living space.
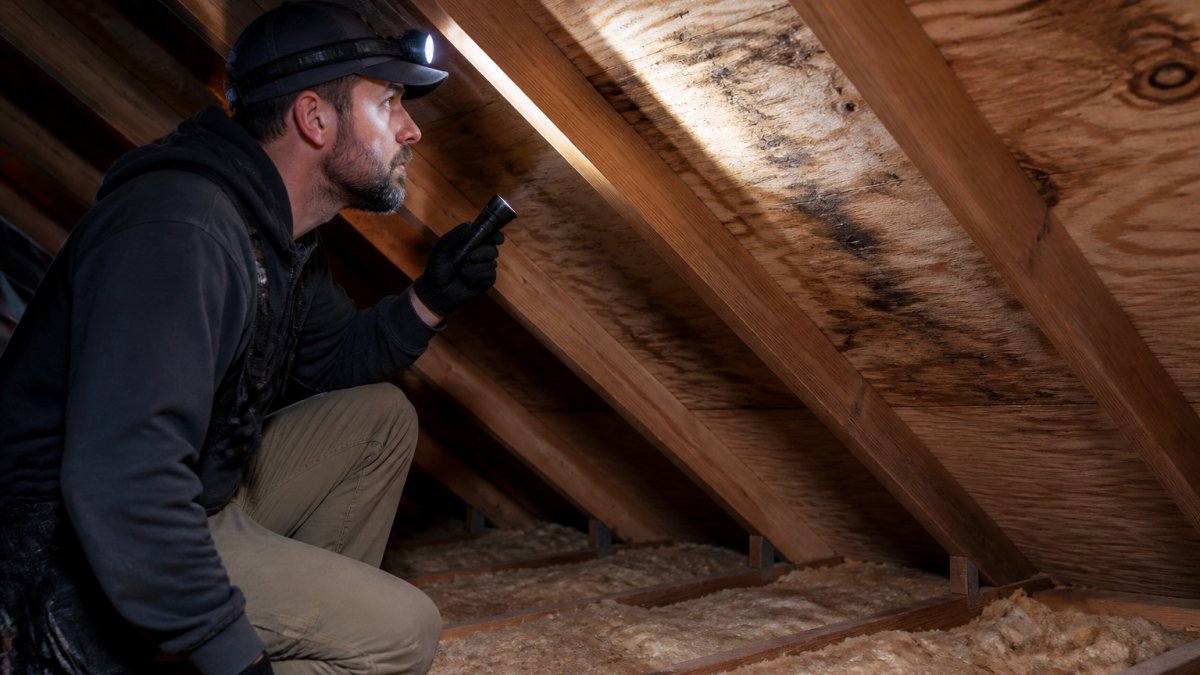
Water stains and discoloration on roof sheathing
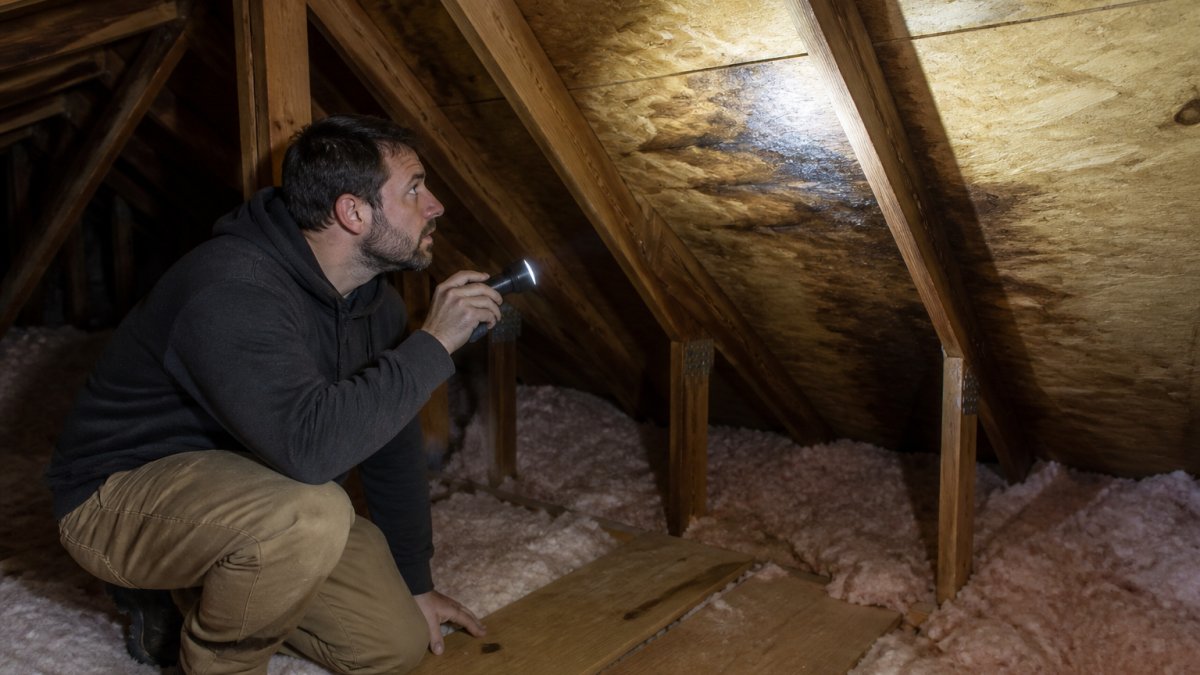
Water stains on roof sheathing, the wooden layer directly beneath your shingles, are among the clearest signs of a roof leak. Water leaves dark brown or gray stains that spread across the wood surface.
Look for these specific stain patterns:
- Dark discoloration that appears wet or damp to the touch
- Stains that follow a path down rafters or along roof joints
- Soft or spongy wood that crumbles when pressed gently
Fresh leaks create wet stains; old leaks leave permanent discoloration even after the wood dries. Seeing both in one area means water has been entering for some time.
Dampness, dripping water, and puddles
Active water intrusion is unmistakable. During or right after heavy rain, water may drip from roof decking or pool on the attic floor, the most urgent sign your roof needs immediate attention.
Watch for these active leak indicators:
- Visible water droplets falling from the underside of roof decking
- Wet spots or puddles on the attic floor or insulation
- Moisture running down rafters or roof joints
If you see active dripping, photograph it and contact a professional roofer right away, active leaks cause rapid structural damage and mold growth.
Mold, mildew, and musty odors
Mold and mildew thrive in damp attics. A musty smell or fuzzy black or green growth on wood means moisture has been present long enough for biological growth to begin.
Mold indicates:
- Prolonged moisture exposure over weeks or months
- Poor attic ventilation combined with water intrusion
- Potential health risks if spores spread into living areas
A musty smell alone warrants investigation, it often appears before visible mold. If the attic doesn't smell fresh, moisture is likely present.
How to Find a Roof Leak Without Going on the Roof
Understanding how to find roof leak source in attic means you don't need to climb onto your roof to locate it. Your attic is the best vantage point: from inside, you can trace water paths, inspect roof penetrations, and identify where water enters.
Inspecting the underside of roof decking
The underside of your roof decking, the plywood or board layer forming the roof's structural base, is where water first appears after entering through shingles.
To inspect roof decking properly:
- Enter your attic safely during daylight hours
- Use a flashlight to examine the underside of all roof areas
- Look for water stains, wet spots, or discoloration on the wood
- Note the exact location and direction of stains
- Check areas around roof penetrations (vents, chimneys, skylights)
- Mark stained areas with tape or chalk for reference
Water stains on decking follow gravity. Trace the highest point of discoloration, that's closest to where water enters; stains below show the path water travels before dripping.
Tracing water stains to their highest point
This technique is crucial for pinpointing leak sources. Water runs downhill along roof decking and rafters. The highest stain marks the entry point.
Follow these steps:
- Locate the most visible water stain in your attic
- Trace it upward along the roof structure
- Follow the stain path toward the highest point
- Look for the stain to stop or change direction
- The highest discolored area indicates where water enters the roof
- Mark this spot and note its position relative to roof penetrations or valleys
This method works even for old, dry stains. Permanent discoloration remains visible long after moisture evaporates. The pattern of staining reveals the water's path.
Step-by-Step Attic Inspection Procedure
A systematic inspection prevents missed details. Follow this procedure to map your attic's moisture situation.
Prepare your attic and gather supplies
Before entering your attic, gather the right tools and prepare for safety.
You'll need:
- Flashlight with fresh batteries or LED headlamp
- Moisture meter (optional but helpful for detecting hidden dampness)
- Tape measure for noting stain locations
Wear long sleeves and pants against fiberglass insulation, and step only on beams or attic flooring, never on ceiling joists unless you're certain they'll support your weight.
Map water damage and moisture patterns
Document every sign of moisture you find. This record helps a professional roofer and shows whether the problem is active or old.
Create a simple map:
- Start at one corner of the attic and work systematically
- Note the location of each water stain (north wall, east slope, etc.)
- Mark stains by their distance from roof penetrations or walls
- Photograph each stained area with your phone
- Use a moisture meter to check for hidden dampness in apparently dry areas
- Record the date and any recent weather events
- Note whether stains appear wet, damp, or completely dry
This documentation is invaluable if you later hire a roofer. It shows the leak's pattern and severity.
Check roof penetrations and flashing
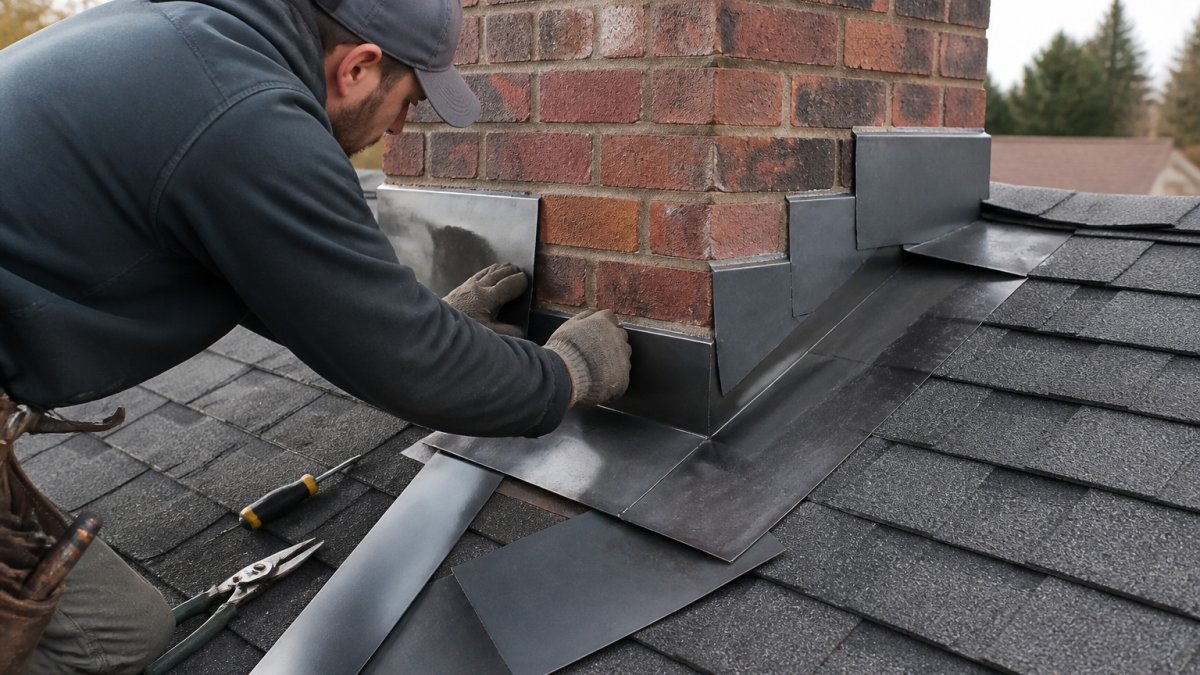
Roof penetrations, openings where pipes, vents, and fixtures pass through the roof, are the most common leak sources. Flashing, the metal strips sealing these openings, often fails and lets water in.
Inspect these penetrations carefully:
- Plumbing vents (pipes that extend through the roof)
- Exhaust pipes from bathrooms and dryers
- Chimneys and their flashing
Look for gaps, rust, missing sealant, or lifted flashing. Water often pools around penetrations before finding a way inside. Check both the underside (from your attic) and the top of the roof if safely possible.
Inspect shingles, joints, and roof openings
From your attic you can't see shingles directly, but water damage patterns point to problems above. Roof joints and openings are weak points where water enters.
Look for stains near:
- Roof valleys (where two slopes meet at an angle)
- Dormers and their edges
- Roof-to-wall joints
These locations accumulate debris and face greater water pressure during heavy rain; stains below them suggest where your leak originates.
Roof Leak Detection Tools That Work
The right tools make leak detection faster and more accurate, some essential, others confirming what you've found.
Essential tools for attic inspection
A good flashlight is non-negotiable in dark attics. LED headlamps are ideal because they free both hands for climbing and note-taking.
A tape measure documents stain locations precisely, note distances from walls, roof peaks, and penetrations so roofers can locate the problem from outside.
A camera or smartphone creates a visual record; photos show stain patterns and severity better than notes alone.
Controlled hose testing and when to use it
Hose testing sprays water on your roof to recreate leak conditions, pinpointing sources, but it requires caution and proper procedure.
Only use hose testing if:
- You've already identified the general leak area
- Weather is mild and dry enough to safely work on the roof
- You have a second person inside the attic watching for water entry
Never test in heavy rain or dangerous weather. The goal is controlled water application to confirm a leak location, not to replicate a storm.
To perform hose testing safely:
- Position one person on the roof with a garden hose
- Station another person in the attic with a flashlight
- Start spraying water on the suspected area
- Watch for water to enter the attic
- Mark the entry point immediately
- Stop testing once you've confirmed the location
- Allow the area to dry completely before leaving
This method works best for leaks near penetrations or valleys where the source is suspected but unconfirmed.
Attic Condensation vs Roof Leak: How to Tell the Difference
Not all attic moisture comes from roof leaks, condensation, plumbing leaks, and HVAC drains can all create dampness. Distinguishing between them prevents unnecessary roof repairs.
Signs of condensation in the attic
Condensation forms when warm, humid air meets cold surfaces, especially in winter or poorly ventilated attics, and feels different from roof leak water.
Condensation typically:
- Appears as a fine mist or light dampness on surfaces
- Affects large areas uniformly rather than concentrated spots
- Occurs most heavily near vents or in corners
Roof leaks, by contrast, create localized stains and concentrated wet spots, while condensation spreads evenly.
Distinguishing roof leaks from plumbing and HVAC leaks
Plumbing leaks originate inside your home. HVAC condensation drains are designed to shed water. Both can drip into attics and create confusion about the leak source.
To identify the source:
Roof leaks:
- Water appears during or shortly after rain
- Stains follow a path down from roof decking
- Stains concentrate near roof penetrations or valleys
Plumbing leaks:
- Water appears regardless of weather
- Stains originate from pipes or fixtures
- Water drips continuously even in dry weather
HVAC condensation:
- Water drips from AC unit or ductwork
- Drain lines may be clogged or disconnected
- Water is clear and clean, not discolored
If water appears only during or after rain, it's almost certainly a roof leak; if moisture is present in all weather, investigate plumbing and HVAC first.
Document Your Findings and Know When to Call a Professional
Once you've completed your inspection, document everything. This record helps you decide whether to attempt repairs yourself or hire a professional.
Moisture measurement and leak documentation
Create a simple written record of what you found:
| Finding | Location | Severity | Date Noted |
|---|---|---|---|
| Water stain on roof decking | North slope, 8 feet from ridge | Dry, old stain | October 8, 2026 |
| Wet spot on insulation | East side, near plumbing vent | Active during rain | October 8, 2026 |
| Mold growth | Southwest corner, rafter base | Small patch | October 8, 2026 |
| Rust on flashing | Chimney penetration | Moderate corrosion | October 8, 2026 |
Include photographs of each problem area. Take photos from multiple angles and distances. Write dates on photos or in your notes.
If you have a moisture meter, record readings from wet and dry areas to help professionals understand the moisture situation.
Safety limits and when to stop DIY inspection
Stop your inspection and call a professional if you encounter:
- Active mold growth (black or green fuzzy patches)
- Structural damage (soft, crumbling wood or sagging decking)
- Electrical hazards (water near wiring or outlets)
If your inspection reveals significant damage, active leaks, or mold, professional assessment prevents further deterioration, our certified technicians pinpoint leak sources quickly and recommend long-term repairs.
Finding your roof leak source doesn't require climbing onto your roof. A careful attic inspection reveals where water enters and how it travels. Document what you find, understand the difference between roof leaks and other moisture sources, and know when professional help prevents bigger problems.
Frequently Asked Questions
How do you find where a roof leak is coming from in the attic?
Start by looking for visible signs: water stains on roof sheathing, damp areas, or active dripping during or after rain. Use a flashlight to trace stains upward along rafters and decking to locate the highest point of water damage. Check roof penetrations like chimneys, vents, and skylights, as these are common leak sources. If you can't spot the leak visually, controlled hose testing (spraying water on specific roof sections while watching for interior dripping) helps pinpoint the entry point. Document all findings with photos and measurements.
Why does a roof leak show up far from where it actually enters the attic?
Water travels along rafters, roof decking, and interior framing before dripping into visible areas. A leak at a roof penetration near the peak may run down a rafter for several feet before pooling on sheathing or dripping through to the ceiling below. This is why tracing water stains upward, not downward, is critical. The actual entry point is always higher than where you see the damage. Following the grain of the wood and the path water would naturally take helps you work backward to the true source.
Can you tell a roof leak from attic condensation?
Roof leaks produce localized, dark water stains that follow a path along rafters or sheathing, often with active dripping during rain. Condensation appears as light moisture or frost distributed evenly across large areas, especially near soffit vents, and occurs when warm, humid air meets cold surfaces. Condensation is worse in winter or after temperature swings, while roof leaks correlate directly with rainfall. If moisture appears only after rain and concentrates in one area, it's likely a roof leak. If it's widespread and occurs even without rain, suspect condensation or inadequate attic ventilation.
What tools do I need to find a roof leak in my attic?
Essential tools include a bright flashlight or headlamp, a moisture meter to measure dampness levels, a camera or smartphone for documenting water stains, and a measuring tape to record damage locations. A small mirror helps you see into tight spaces under rafters. Wear safety glasses and gloves. For controlled hose testing, you'll need a garden hose and a helper outside. A notebook or clipboard keeps your inspection organized. Avoid climbing on wet or unstable decking, and never venture into areas with active mold or structural damage without professional help.